Downloading Sharepoint documents from .NET with PnP.Core, without Windows
Martijn Storck
The combination of .NET and Sharepoint has historically been Windows-centric. Accessing Sharepoint from .NET would require access to Windows Powershell and local certificate stores. Today, with cross-platform .NET this is no longer the case, but documentation on how to access Sharepoint 365 without using any Windows technologies is rare. This article will show how to access Sharepoint using the PnP.Core package on macOS with .NET 7. PnP.Core is an open source, community provided, .NET SDK to work with Microsoft 365 services such as Sharepoint Online and Teams. It is the evolution of the PnP.Framework package.
Gaining App Only access to Sharepoint
Access to Sharepoint is granted through the Azure Active Directory that manages access through the particular instance. Specifically, we will create a new App Registration in Azure ID. Our application will authenticate using a self-signed X.509 certificate
Generating a self-signed certificate using Powershell on macOS
To generate a suitable certificate, we will use Powershell and the PnP Powershell module. Powershell has been available for non-Windows operating systems for a long time and is very useful when working with Microsoft technologies such as Microsoft 365 and Azure.
The most common way to install Powershell on macOS is through homebrew:
brew install --cask powershell
After installing, powershell can be started by issuing the pwsh command. In
a Powershell console, issue the following commands to install the module and issue a certificate:
Install-Module PnP.PowerShell -Scope CurrentUser

New-PnPAzureCertificate -OutPfx pnp.pfx -OutCert pnp.cer -CommonName "<A Descriptive Name For Your Application>" -ValidYears 2 -CertificatePassword (ConvertTo-SecureString -String “<A password for the Pfx>” -AsPlainText -Force)
Two files will be generated: pnp.cer contains the public part of the certificate that will
be uploaded to Azure AD, and pnp.pfx is the file that contains the certificate along with the private key.
Configuring the Azure AD App registration
The details of creating the app registration and uploading the certificate are described in the official Microsoft documentation at this URL:
https://learn.microsoft.com/en-us/sharepoint/dev/solution-guidance/security-apponly-azuread
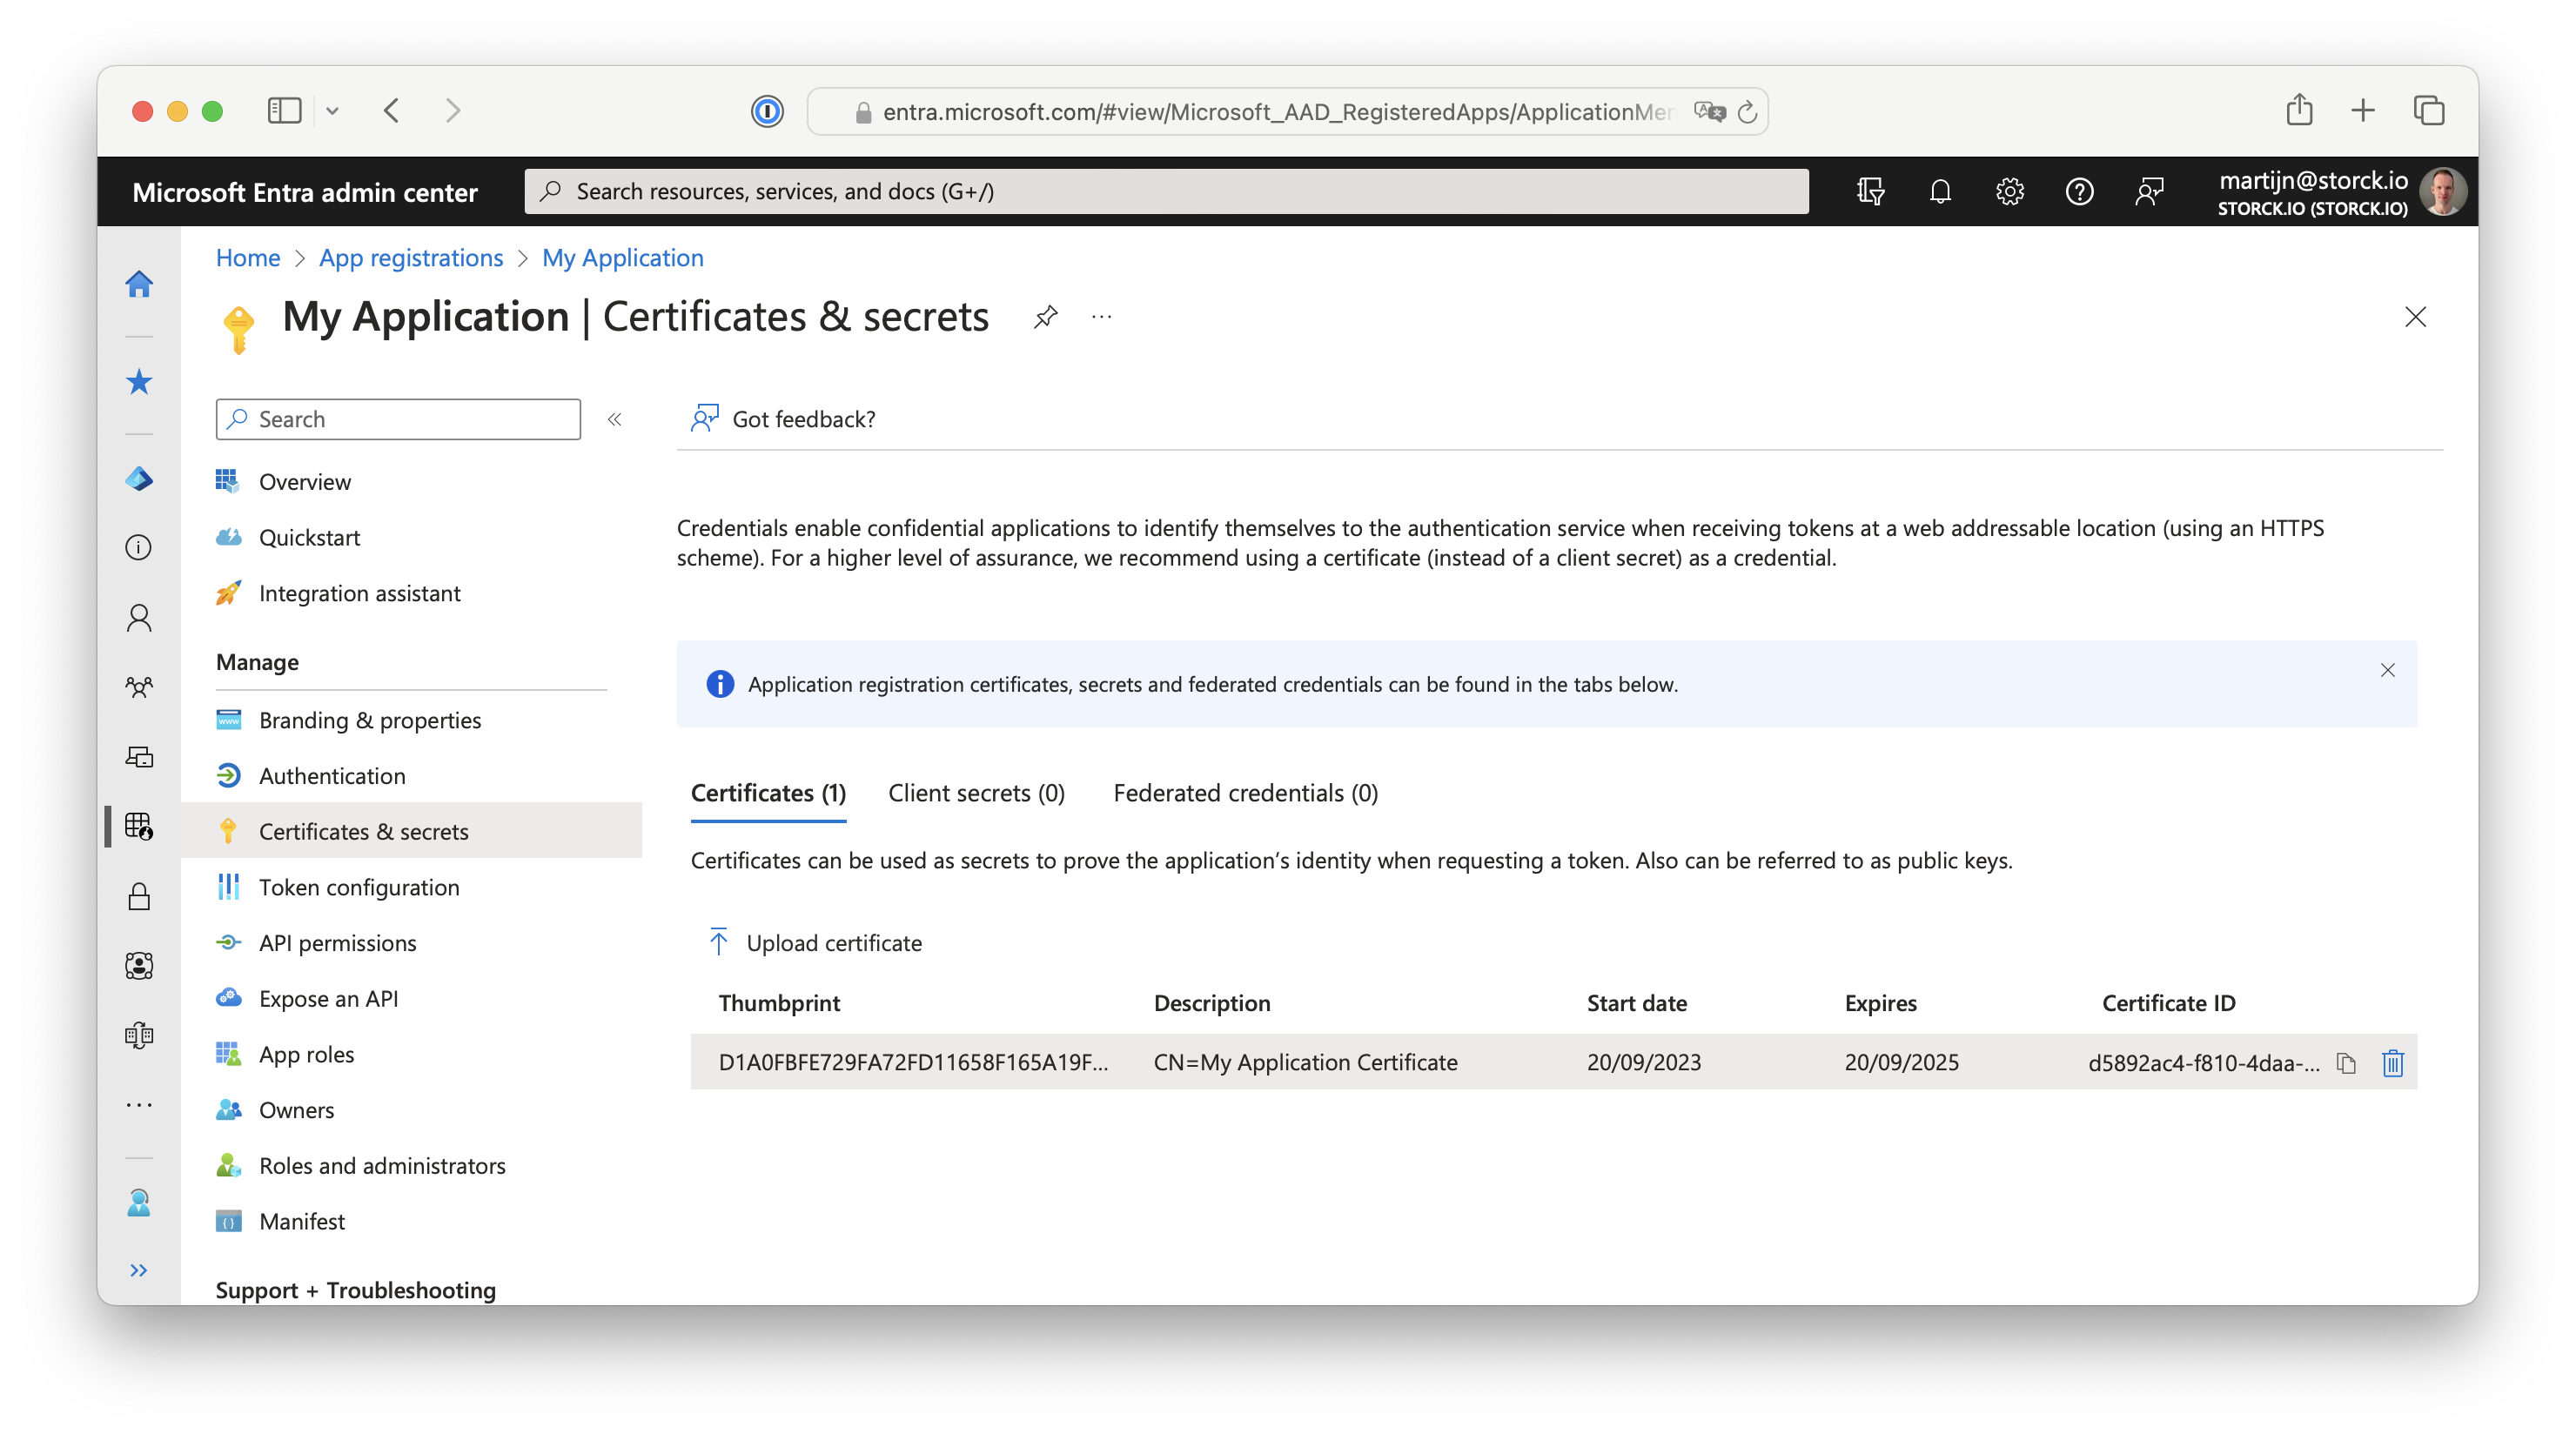
You will administrator access to the Microsoft Entra admin portal. After succesful configuration the app registration will look as follows:

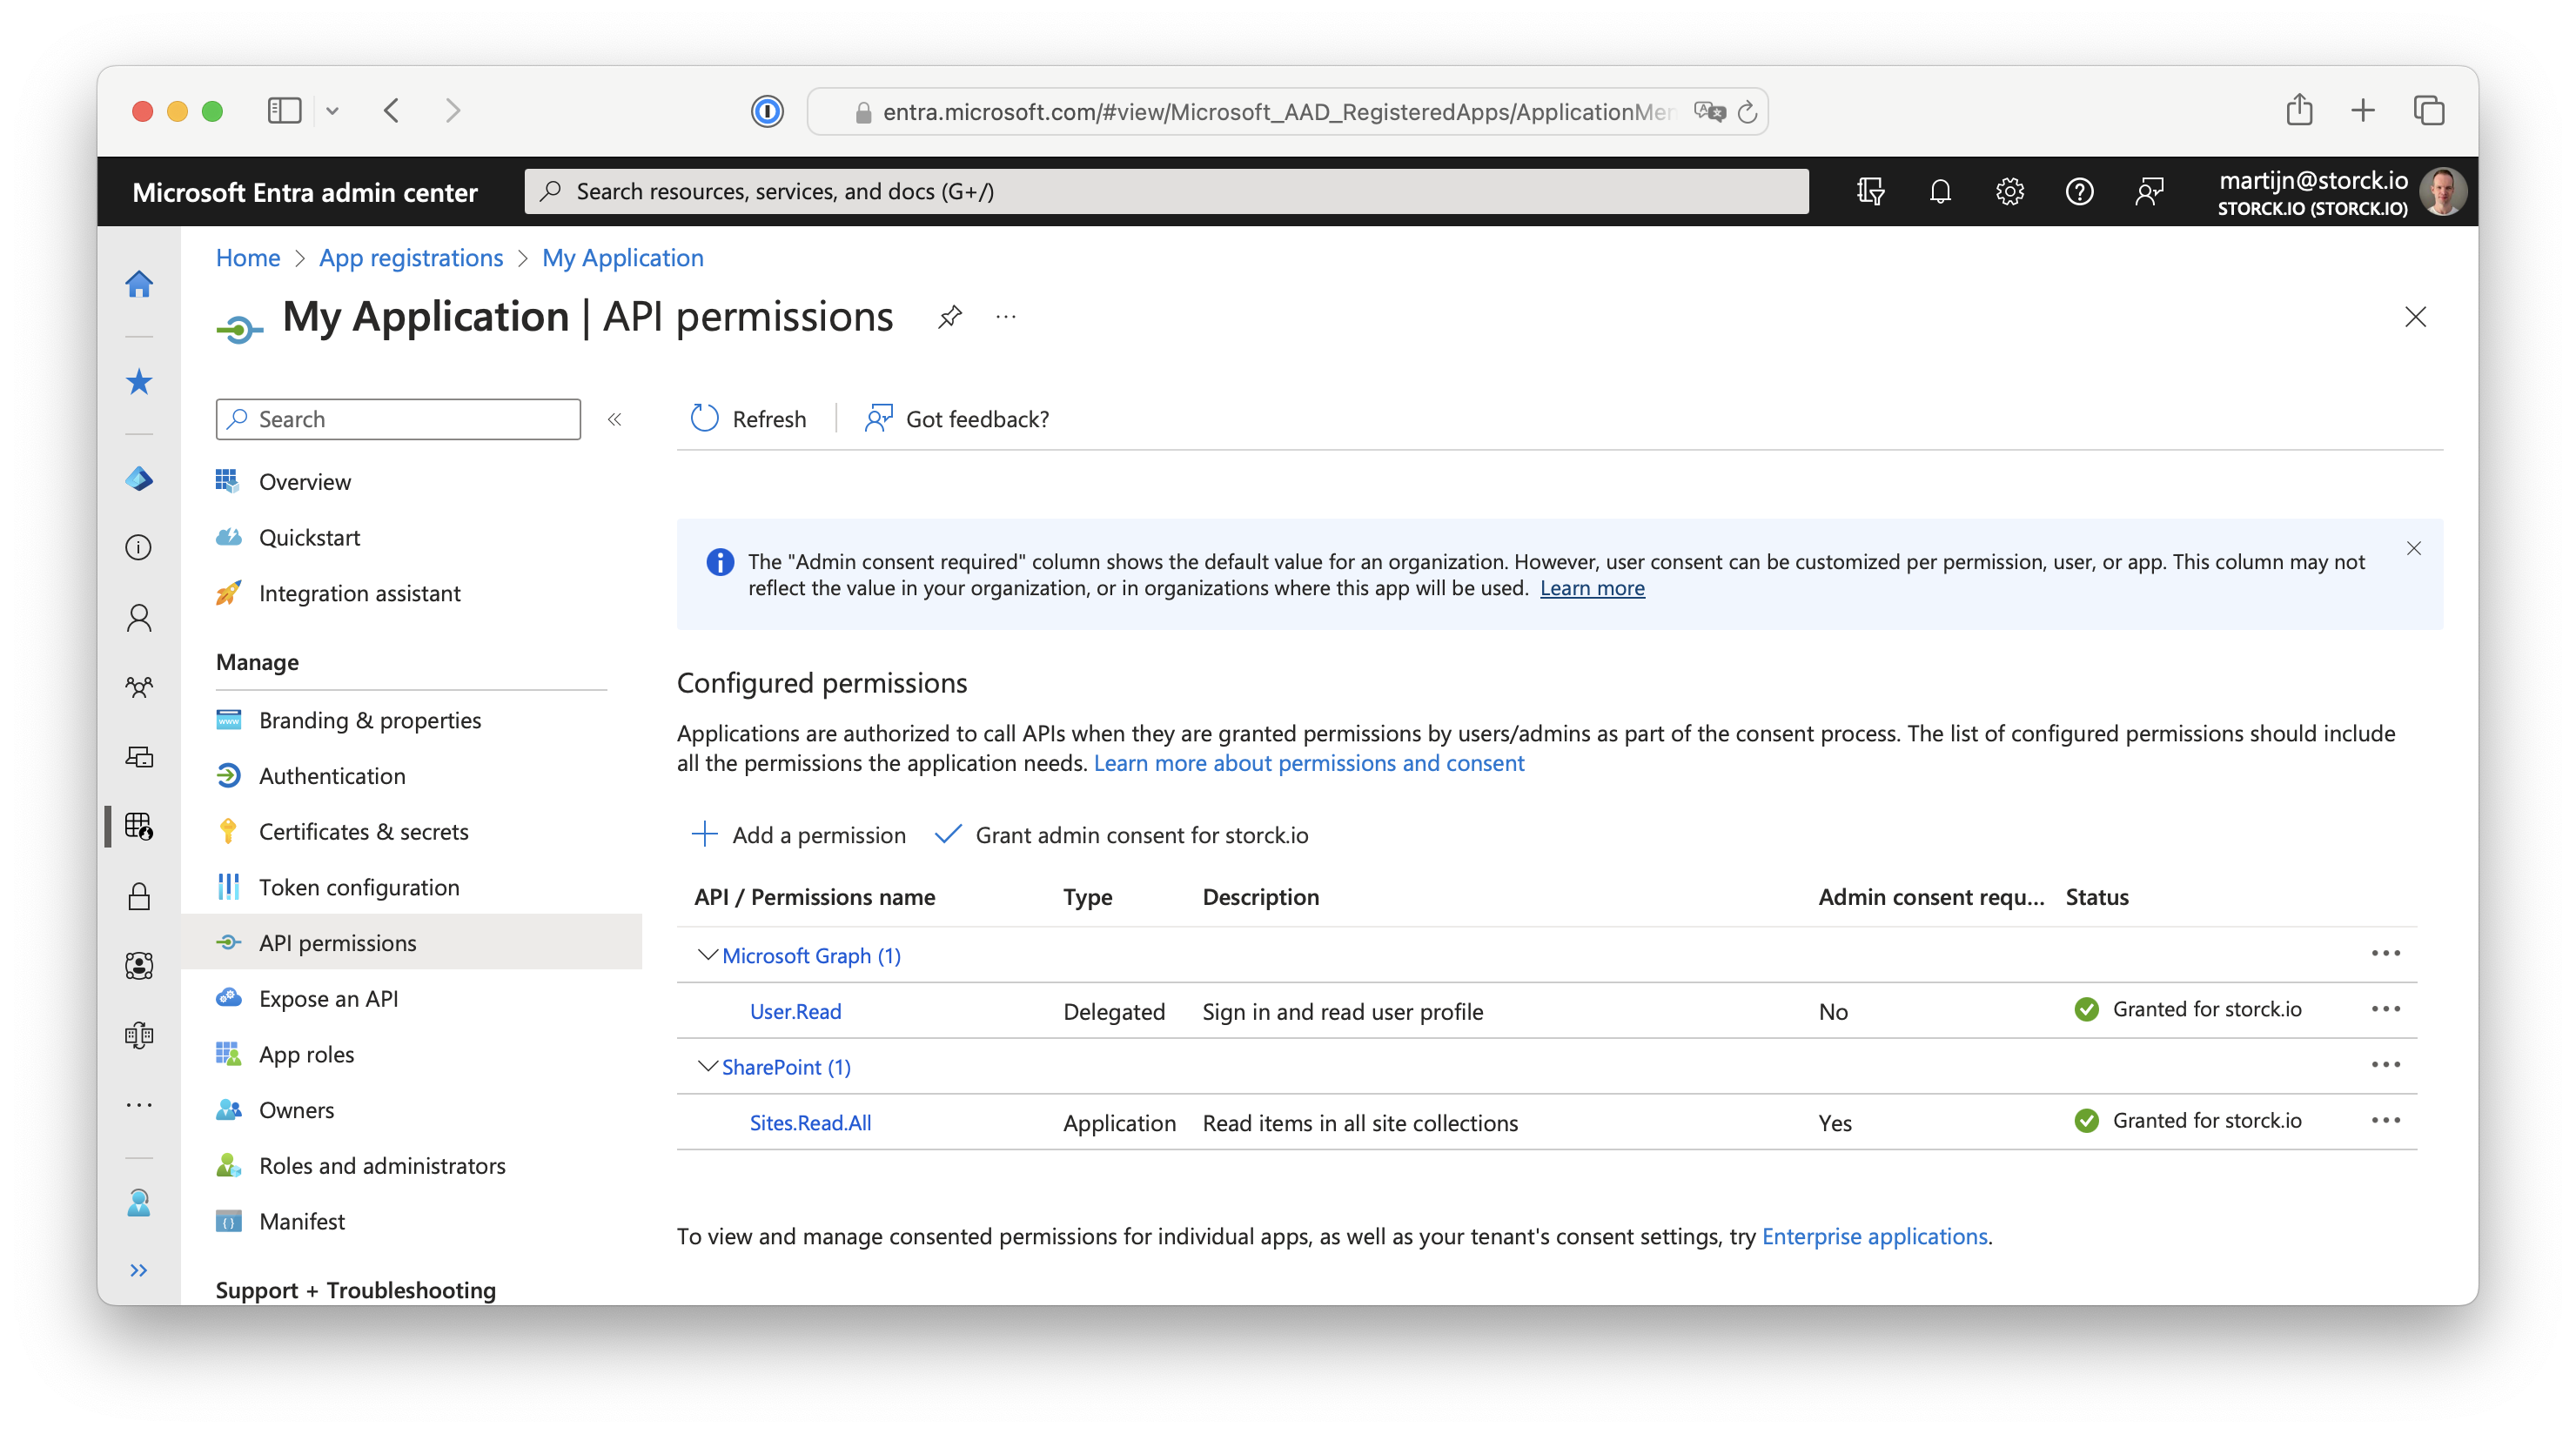
The API permissions to read all Sharepoint sites should look as follows. In practice, you should consider using the Sites.Read.Selected permission, but that is outside the scope of this example as it depends on permissions management inside Sharepoint.

Details to write down
Before starting on our application, make note of the following details:
- The Client ID of the created App Registration, which can be found on the ‘Overview’ page in the Entra portal
- The Tenant ID for Azure AD (XXX.onmicrosoft.com), which can be found in the MS 365 Admin center
- The URL for the Sharepoint domain (XXX.sharepoint.com)
- The name of the Sharepoint site (i.e. Sandbox)
Downloading a file by known URL from Sharepoint
As an example, we will build a simple Web API project that acts as a proxy between Sharepoint and an HTTP client.
Many examples of the PnP SDK depend on the self-signed certificate being stored in the local certificate store, which is common practice on Windows but not available on macOS and Linux. Hence, in this example we will store the pfx file within our application. For brevity, the password will be hardcoded in this example. In practice, you will want to secure this using appropriate mechanisms when deploying your application.
Setting up the project
Create a new minimal Web Api application using the dotnet cli:
dotnet new webapi -o SharepointDemo -minimal
Copy the generated pnp.pfx into the root of the project and include it in the build
by adding the following item group to SharepointDemo.csproj:
<ItemGroup>
    <Reference Include="pnp.pfx"/>
</ItemGroup>
Configuring PnP.Core
The PnP.Core SDK has extensive configuration updates but I prefer the straightforward example
below. This call will add an IPnPContextFactory to the DI container, which we will use
to access Sharepoint from our controller actions. Add the following code to your project and fill in
the details you wrote down in step one:
builder.Services.AddPnPCore(options =>
{
    options.Sites.Add("Sandbox", new PnPCoreSiteOptions // A local reference for this site configuration
    {
        SiteUrl = "https://my-company.sharepoint.com/sites/sandbox",
        AuthenticationProvider = new X509CertificateAuthenticationProvider(
            "00000000-0000-0000-0000-000000000000", // Client ID
            "my-company.onmicrosoft.com", // Azure AD Tenant id
            new X509Certificate2("pnp.pfx", "<pfx-password>")) // pfx file and password
    });
});
Accessing a file on Sharepoint
This controller action shows how to use the PnPContextFactory to get a file named test.png from our
Sandbox site and stream it to the client, with some necessary error handling and logging:
app.MapGet("/", async (IPnPContextFactory factory, ILogger<Program> logger) =>
{
    using var context = await factory.CreateAsync("Sandbox");

    IFile file;

    try
    {
        file = await context.Web.GetFileByServerRelativeUrlAsync("/sites/Sandbox/test.png");
    }
    catch (SharePointRestServiceException e)
    {
        logger.LogWarning("Sharepoint error:\n{e}", e);
        return Results.Text($"SharePoint returned an error: {(e.Error as SharePointRestError)?.Message}");
    }

    logger.LogDebug("Retrieved file with id {uniqueId} from SharePoint", file.UniqueId);

    var stream = await file.GetContentAsync();
    return Results.Stream(stream, "image/png");
});
That’s all there is, accessing Sharepoint from a .NET application on Linux or macOS. No Windows required. The PnP.Core API is rich in functionality. Be sure to take a look at the official documentation for further guidance.